

How To Whiten Background Of Photo
Excel for Microsoft 365 Discussion for Microsoft 365 Outlook for Microsoft 365 PowerPoint for Microsoft 365 Projection Online Desktop Client Excel for Microsoft 365 for Mac Word for Microsoft 365 for Mac Outlook for Microsoft 365 for Mac PowerPoint for Microsoft 365 for Mac Excel 2021 Word 2021 Outlook 2021 PowerPoint 2021 Projection Professional 2021 Project Standard 2021 Excel 2021 for Mac Discussion 2021 for Mac Outlook 2021 for Mac PowerPoint 2021 for Mac Excel 2019 Discussion 2019 Outlook 2019 PowerPoint 2019 Project Professional person 2019 Project Standard 2019 Excel 2019 for Mac Word 2019 for Mac Outlook 2019 for Mac PowerPoint 2019 for Mac Excel 2016 Word 2016 Outlook 2016 PowerPoint 2016 Project Professional 2016 Projection Standard 2016 Excel 2016 for Mac Give-and-take 2016 for Mac Outlook 2016 for Mac PowerPoint 2016 for Mac Excel 2013 Word 2013 Outlook 2013 PowerPoint 2013 Project Professional 2013 Project Standard 2013 Excel 2010 Give-and-take 2010 PowerPoint 2010 Excel for Mac 2011 Word for Mac 2011 Outlook for Mac 2011 PowerPoint for Mac 2011 Excel Starter 2010 Word Starter 2010 More...Less
Yous tin remove a background from a picture to accent the subject or to remove distracting particular.
Yous tin use the automatic groundwork removal or draw lines to bespeak the areas to keep and remove.
Background removal isn't bachelor for vector graphic files, such as Scalable Vector Graphics (SVG), Adobe Illustrator Graphics (AI), Windows Metafile Format (WMF), and Vector Drawing File (DRW).

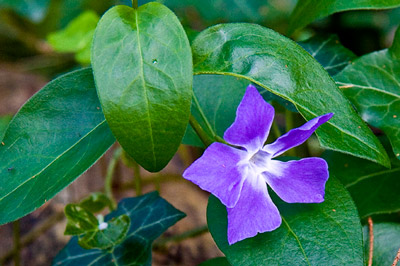
Original flick

Same motion picture with the groundwork removed
-
Select the picture that you want to remove the groundwork from.
-
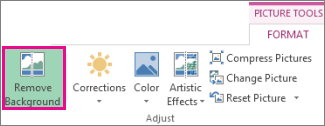
Select Picture Format > Remove Background, or Format > Remove Background.

If y'all don't see Remove Background, make sure yous selected a moving picture. You might have to double-click the picture show to select information technology and open up the Format tab.
-
The default groundwork expanse will be colored magenta to marking it for removal, while the foreground will retain its natural coloring.
-
If the default expanse isn't right, become to Background Removal > Picture Tools and practice 1 or both of the following:
-
If parts of the picture that yous want to keep are magenta (marked for removal), select Marking Areas to Continue and utilise the free-form drawing pencil
 to mark the areas on the moving picture that you want to keep.
 -
To remove more than parts of the picture, select Marker Areas to Remove and utilize the drawing pencil
to mark those areas.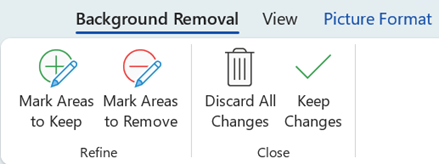
-
-
When y'all're done, select Go along Changes or Discard All Changes.
To save the image in a carve up file for afterward use, correct-click the image and select Save as Flick.
Y'all tin apply an artistic result or add flick effects to the picture remaining after you've removed the background.
Of import: Office 2010 is no longer supported. Upgrade to Microsoft 365 to work anywhere from whatever device and continue to receive support.
Upgrade now
-
Select the movie that yous desire to remove the groundwork from.
-
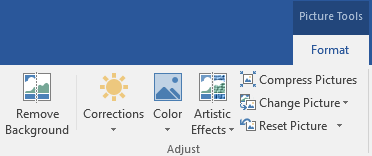
Under Picture Tools, on the Format tab, in the Adjust grouping, select Remove Groundwork.
-
Click ane of the handles on the marquee lines and so drag the line so that it contains the portion of the picture show that you wish to keep, and excludes well-nigh of the areas you wish to remove.

You lot can sometimes get the result you want without whatsoever additional work past experimenting with the position and size of the marquee lines.
Tip:To undo marked areas, select Delete Mark and then select the line.
-
If the default area isn't correct, become to Background Removal > Picture Tools and do one or both of the following:
-
Select Marker Areas to Keep and utilize the drawing pencil
to mark the areas on the picture that you want to proceed. -
Select Mark Areas to Remove and use the drawing pencil
to mark those areas to remove.
-
-
When y'all're done, select Go along Changes or Discard All Changes.
To relieve the image in a separate file for later apply, correct-click the image and select Save every bit Picture.
Y'all tin can apply an artistic issue or add together picture furnishings to the picture remaining later on you've removed the groundwork.
Remove the background of a picture
-
Select the motion-picture show.
-
On the Picture Format tab of the ribbon, select Remove Groundwork.
If y'all don't see Remove Groundwork or the Picture Format tab, make certain that yous've selected a picture. You might take to double-click the picture to select it and open up the Picture Format tab.
-
The default groundwork surface area is colored magenta to mark it for removal, while the foreground retains its natural coloring.
-
If the default area isn't correct, under Flick Tools, on the Background Removal tab, do 1 or both of the following:
-
Select Mark Areas to Keep and use the free-class drawing pencil
to mark the areas on the flick that you desire to proceed. -
Select Mark Areas to Remove and use the drawing pencil
to mark those areas to remove.
-
-
When you're washed, select Keep Changes or Discard All Changes.
To salvage the image in a divide file for later on use, right-click the image and select Save as Flick.

How To Whiten Background Of Photo,
Source: https://support.microsoft.com/en-us/office/remove-the-background-of-a-picture-c0819a62-6844-4190-8d67-6fb1713a12bf
Posted by: densonenterce.blogspot.com
0 Response to "How To Whiten Background Of Photo"
Post a Comment