

How To Remove Background Noise From Audio In R
It's useful to have some tools and skills to clean upwardly a noisy audio file. Perhaps when digitizing an old and precious family tape recording or when yous accept captured that astonishing interview for your podcast just in that location's an annoying groundwork noise.
Whilst you can't make everything perfect at that place are lots of approaches to improving an sound file and, rather excellently, lots of these tools are found already built into the free and open source audio editor Audacity.
Audacity can be used as an audio recorder with multiple microphones, or information technology tin can work with existing audio files (WAV, MP3, OGG, AIFF etc). For this how-to we will piece of work on some pre-recorded sound that requires cleaning upwardly.
Installing Brazenness
one. Download and install Audacity for your operating organisation.
two. Click File >> import to bring in your target audio file.Audacity happily handles many audio file types, the common uncompressed WAV and AIFF files, the equally common compressed MP3 files, but too slightly less common types such as OGG and FLAC files.
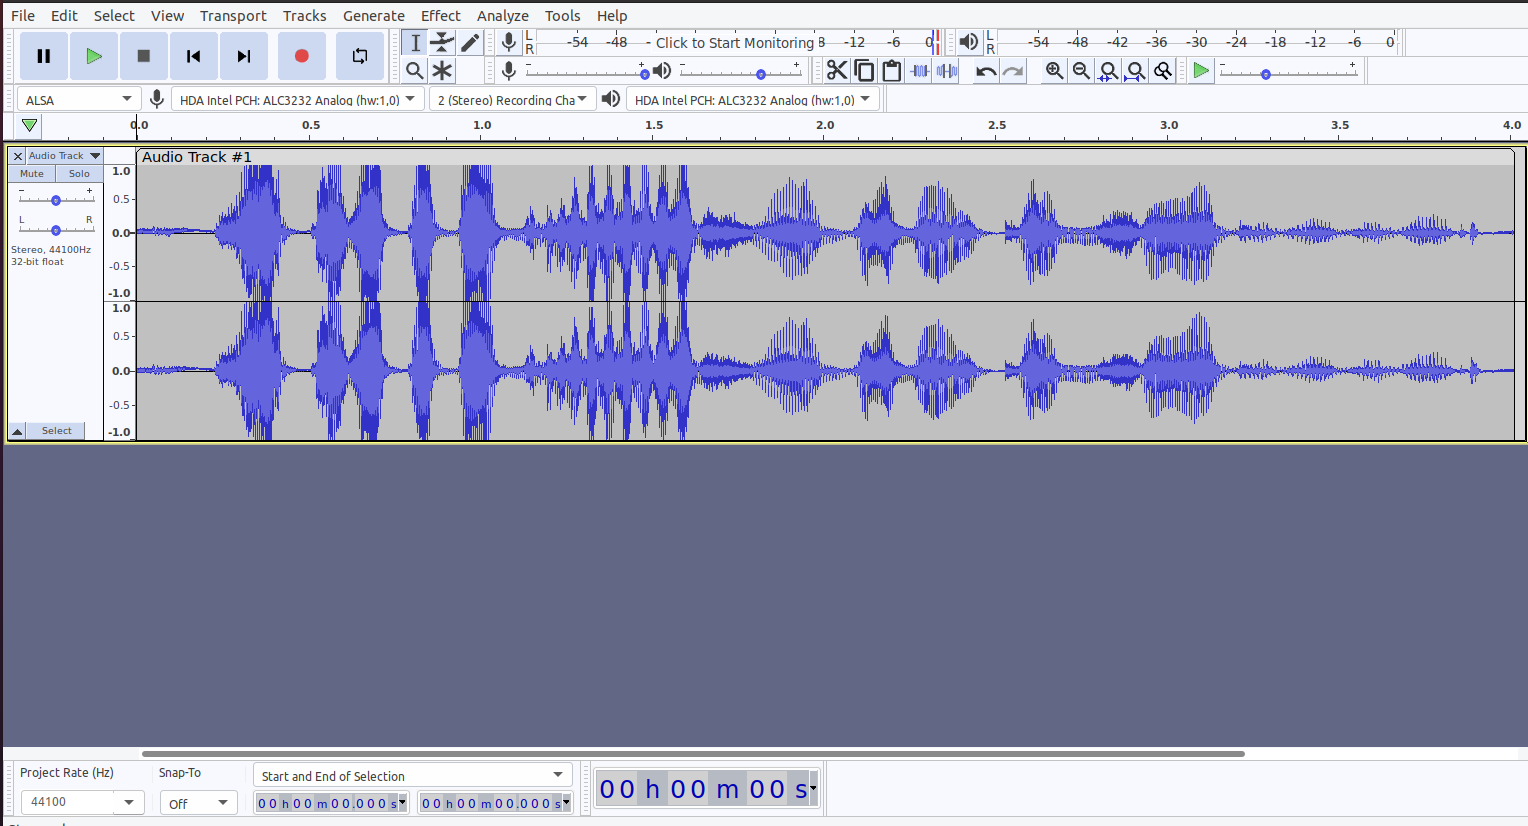
3. Click the play push to hear your file. The waveform represents your audio file. A unmarried waveform indicates a mono recording, ii waveforms represent a stereo audio file (left and right channels.
Identifying the issues
When trying to clean upward audio we first demand to consider what issue or issues are causing the audio to be poor. Mutual faults might include, a high pitched hissing in the background, parts of the runway where the audio is then loud information technology "clips" and causes loud distorted cracks.
Other issues might be groundwork noise in the recording such as wind dissonance hitting a microphone, a train rumbling by in the altitude, or that the audio is simply as well quiet. It's worthwhile listening through your target audio file a few times and making notes of areas and times that accept issues y'all want to try and improve.
1. Become through the recording and press the spacebar to cease and start audio playback. Note that this will reset the playback to the cursor position, so it's useful if you want to listen to the aforementioned trivial section repeatedly.
2. Pause playback past clicking the "p" button on your keyboard. This pauses the play position and you can note the fourth dimension position, handy for making a listing of places in the file with issues.
Cleaning upwardly audio baloney
Now nosotros take our potential list of problems, let's look at approaches to making improvements to our audio.
In our test audio there was a modest explosive click in the audio that caused the VU meter to wink into the crimson section and acquired our headphones to briefly misconstrue. You can usually see the indicate in the audio file and y'all can utilise the zoom icons to zoom in on the trouble.
It's unlikely that we can reduce the baloney in the audio at this point merely we can just reduce the amplitude of this part of the waveform meaning that although distorted for a moment information technology doesn't cause our speakers to pop and create discomfort for the listener.
1. Click slightly to the left of the problem surface area and drag over the area to the right so you can highlight this modest section of clipped audio.
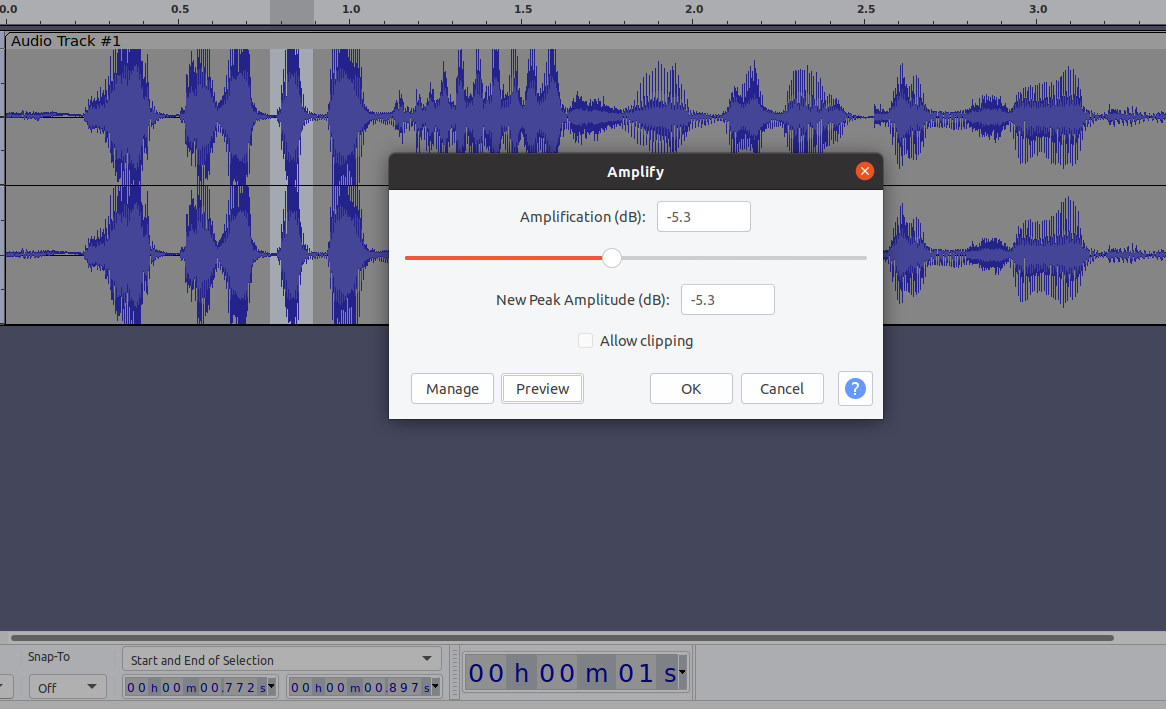
2. Click on the Effects drop downwardly card and select "Amplify".
3. Reduce the amplification value either by typing a negative value into the "Distension (dB):" input box or by using the slider. Try reducing the value to -1dB and click the "OK" push. The highlighted area of the waveform will reduce in pinnacle.
iv. Listen to the new version and see if that has fixed the issue. Watch the VU meter and see if the trouble still causes the output to clip showing the red line in the meter. You can, of course, use control and z to disengage the adjustment or y'all tin become dorsum into the Amplify effect and make further reductions or adjustments.
Cleaning up an aural hiss
For our next audio issue, permit's wait at the classic high pitched hiss in the groundwork of an audio recording. This could be caused by wind noise, or an overly noisy Air-conditioning unit of measurement. There are a few different approaches we tin can try to achieve this. A get-go approach to consider is using a low laissez passer filter or a notch filter to basically cut the frequency area of the hiss out of the sound file. But before nosotros practise that, we need to spot where the issues are.
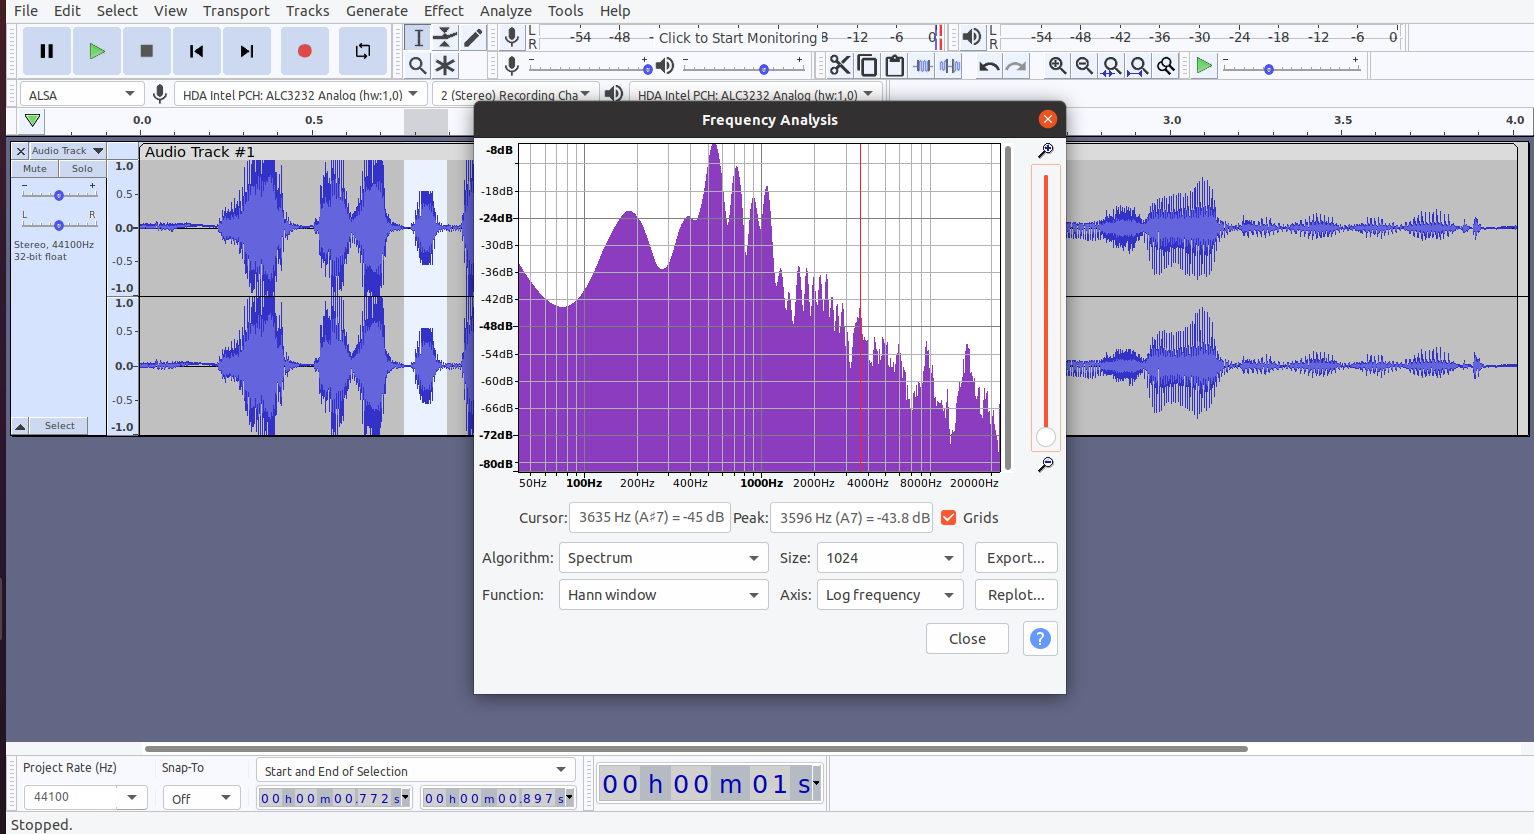
1. Select all the sound and from the Analyze drib down carte click Plot Spectrum. In the Frequency Assay window nosotros can see all the frequencies that are in our audio file. Nosotros don't need to understand it fully for it to be useful merely the basic premise is the higher frequencies are to the right of the diagram and the left mitt side are the lower frequencies.
Well-nigh music has some sound information in all frequency areas, but simpler recordings of a voice for example might just use specific parts of the range. This means nosotros might be able to cut out entire parts of the frequency range without affecting the target sound in the file. For a high pitched hiss issue y'all might also encounter a stand alone spike in the upper frequencies where the hiss is pitched, you tin can then make a notation of the frequency area the hiss sits in by reading the X axis of the plotted spectrum. This can help yous target your filter to remove the hiss.
ii. Make a note of which frequencies (x axis) are afflicted by hiss.
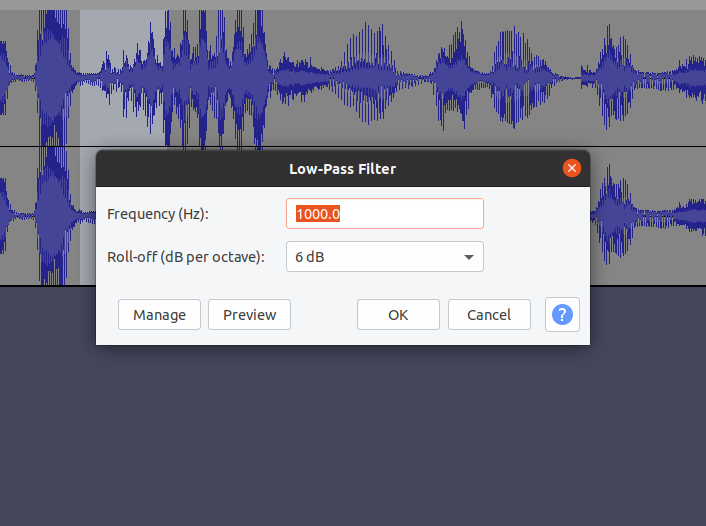
3. To remove a high pitched hiss, select all the audio file waveform and from the Effect drib down select Low Laissez passer Filter.
4. In the Frequency input field, enter in a value slightly lower than frequency of the hiss so set Roll-off value via the input box. If your hiss was at 1500 Hz you can set the filter frequency to say 1400 Hz and tweak the roll-off value according to your requirements.
5. Listen to the preview. You should observe a reduction in your hiss. If you are happy with the result, click OK to utilize. If not, go back to step 4 and tweak the frequency / whorl-off.
A notch filter is a filter that reduces all the frequencies in a notch shape in the frequency response. This is useful if you lot have a recording where perhaps a hiss exists but using a lowpass filter might affect other parts of the audio. For example if you had a recording with lots of cymbals being played by a percussionist, removing a high pitch hiss might well too bear upon the cymbal audio.
1. From Event, select the Notch Filter.
two. Tweak the target frequency (which will be the center of the notch) and click Preview.
3. Increment / decrease the Q value for a wider / narrower notch. Click Preview to listen to the audio.The results tin can always be undone so it'south worth trying the filters repeatedly and replotting the frequency spectrum and listening to fine melody your approach.
Finally on filters, you can use a loftier pass filter in which you select a frequency and everything below that frequency is reduced just anything higher up it is unaffected. Loftier laissez passer filters are often a skillful solution for the rumble of a distant train or other depression frequency artifacts in a recording.
1. Click on Consequence >> High-Pass Filter.
two. To remove a low pitched rumble, select the audio file waveform and from the Outcome drop down select Loftier-Pass Filter.
3. In the Frequency input field, enter in a value slightly higher than frequency of the rumble so set Coil-off value via the input box. If your rumble was at 1000Hz you lot can set the filter frequency to say 1100Hz and tweak the roll-off value according to your requirements.
4. Listen to the preview. You should notice a reduction in your hiss. If you lot are happy with the result, click OK to apply. If not, get back to pace 3 and tweak the frequency / roll-off.
Adding Racket Reduction
You may have a recording that has a more complex collection of unwanted noises in information technology. For these challenging situations, it can be useful to try the "Noise Reduction" effect. This issue is peculiarly expert if you have some sections in your recording that only comprise the unwanted dissonance and not the target audio. In fact, if yous are recording in the field and you know a recording will incorporate unwanted noise it's very useful to create a skilful recording of what you lot don't want!
ane. Highlight a department of your audio file that only contains the unwanted noise. It needs to be over 0.05 of a 2d long in a 44.1kHz WAV file but information technology'south not uncommon to select a couple of seconds or more than.
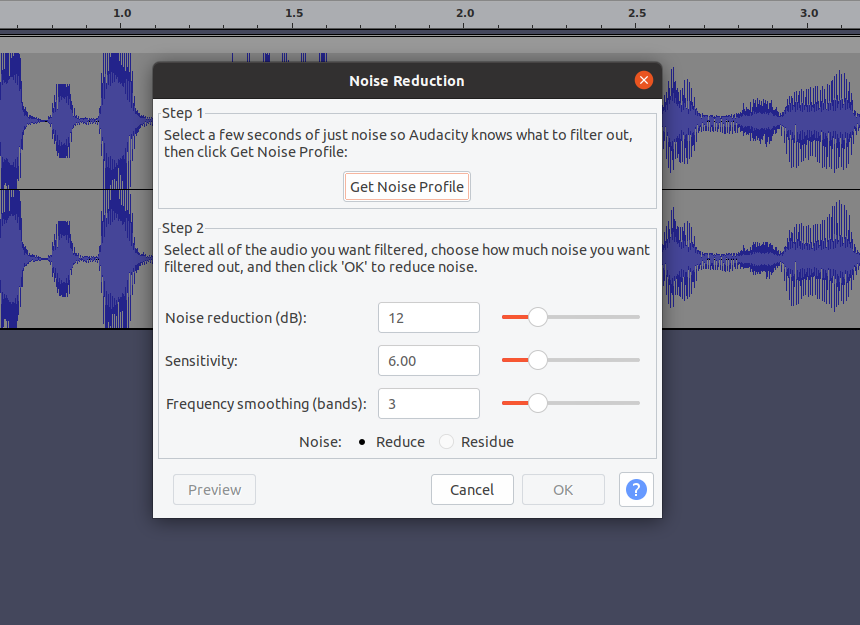
ii. Click on Effects >> Noise Reduction.
three. Click the Get Noise Profile button. The window volition close immediately but you have essentially set up up the event with a sample of what you lot want to remove.

4. Select the area of the file you lot want to apply the racket reduction effect to.
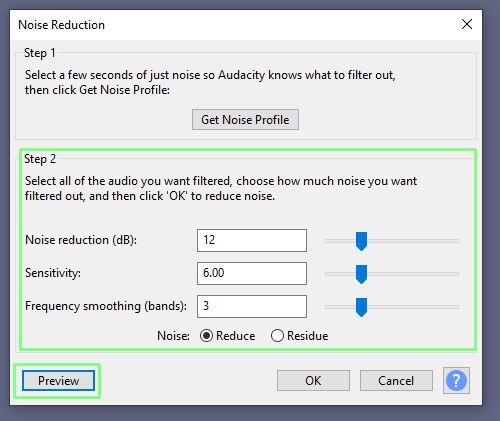
5. Once more, launch the Racket Reduction issue and tweak the values in the "step 2" section. You tin can click the "preview" button in the lower left hand corner of the dialogue box to heed to the bear on of your settings.
6. Click OK to apply the dissonance reduction.
Using these approaches, y'all take a good basic toolset to clean up many unlike problems with sound files. When you are happy with your results, use the File – Export to create your new, cleaned-up audio file.

How To Remove Background Noise From Audio In R,
Source: https://www.tomshardware.com/how-to/remove-background-noise-audacity
Posted by: densonenterce.blogspot.com
0 Response to "How To Remove Background Noise From Audio In R"
Post a Comment